Install a trusted CA in Android N
It’s very trivial to install a user-trusted certificate on Android. Under Settings -> Security you can install new trusted certificates. However, this creates a permanent “Your network could be monitored” warning in your task tray and forces you to have a lock-screen. In addition to this, apps that target API Level 24 and above no longer trust user or admin-added CAs for secure connections, by default.
This guide shows how to install a system-trusted CA certificate. Most of the steps are referenced from Using a custom root CA with Burp for inspecting Android N traffic, excep that this guide is adapted to generate only 730-day certificates to deal with error NET::ERR_CERT_VALIDITY_TOO_LONG in Chrome
Generate
openssl req -x509 -days 730 -nodes -newkey rsa:2048 -outform der -keyout server.key -out ca.der -extensions v3_ca
Convert the private key
openssl rsa -in server.key -inform pem -out server.key.der -outform der
openssl pkcs8 -topk8 -in server.key.der -inform der -out server.key.pkcs8.der -outform der -nocrypt
Convert the public key
openssl x509 -inform der -in ca.der -out ca.pem
openssl x509 -inform PEM -subject_hash_old -in ca.pem | head -1
cp ca.pem a58355c2.0
openssl x509 -inform PEM -text -in ca.pem -out /dev/null>> a58355c2.0
Copy the cert to the phone
adb push a58355c2.0 /data/local/tmp
adb shell
In the adb shell
su
mount -o rw,remount /system
mv /data/local/tmp/a58355c2.0 /system/etc/security/cacerts/
chown root:root /system/etc/security/cacerts/a58355c2.0
chmod 644 /system/etc/security/cacerts/a58355c2.0
reboot
Import the cert into BurpSuite
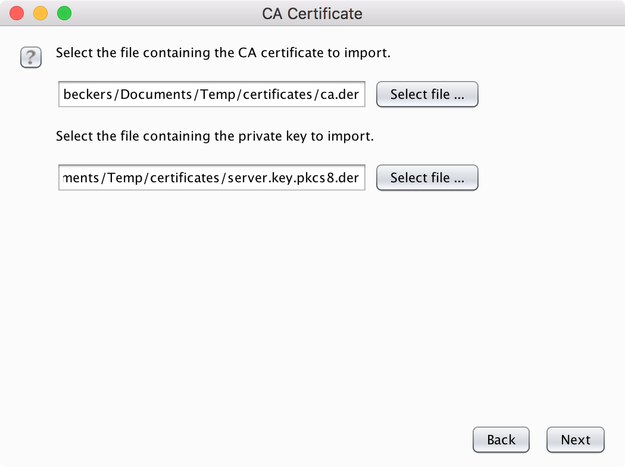
Go to the proxy settings page and choose “Import / Export CA Certificate” -> “Import” -> “Certificate and priate key in DER format”


Leave a Comment
Your email address will not be published. Required fields are marked *